Zog
Blackwing Lair Raider
- 1,832
- 2,357
Adventure's Beginnings
Bit Heroes is, put simply, a simple turn-based game where you explore dungeons searching for loot and monsters. Much of this game plays out like a single-player experience, but other players can have an impact on your game -- in-game friends can join your party when you take on the major dungeons this game has to offer, and the weekly PvP and PvE activities are ranked based on your performance compared to other players.
When you create a character, you'll be able to customize your appearance a little bit (mostly the face) and pick an in-game name. Once you proceed, you won't be able to change your character name, so pick something that you will want to be known by (NOTE: inappropriate names are usually changed to something else by the devs). Appearance can be changed but the price is pretty steep (1000 gems).
The game guides you through the first few battles. Some of the key points to take away from this:
Z_D_ - Zone #, (Major) Dungeon #
Z_F_ - Zone #, Flag # - refers to the smaller "flag" stages between the major dungeons

Occasionally a flag will become notorious enough to be referred to by its boss encounter. Here's the ones most often noted:
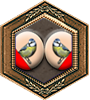
Z2F3 - Pengey / McGobblestein Alliance, more often called the penguin and chicken (even though it's really a turkey). Recommended strategy is to focus on backline damage, e.g. spear weaponry.
Z2F5 - Giant Sugg. This boss can catch players unaware with its vastly higher than expected Agility. Remember to keep your most fragile party member in the back as Sugg has a skill to hit the front 2 positions.
Z3F2 - King Dina. The gatekeeper for entry into zone 3's dungeons. This has a suggested stat total of 200 to get past; Dina only ever attacks the front, but he will hit fast and hard.
Z4F8 - Mega Zorg. The gatekeeper for entry into raid 2. Suggested stat total to take this on is around 550-600. Like Dina, Zorg will only attack your front position.
Details and Strategies
This section will contain some advice and info that I frequently see posted in chat. Among the most popular questions are those relating to your player character's stats and equipment, including the Pet and Accessory slots. It is, after all, a core part of your progression as a player.
Which stat is best? They're all useful, really -- but these builds emerge as the standard:
Regarding those Pet and Accessory slots, there are no dungeon loots for these things. You can only get them from three sources: the gem shop, the guild shop, and occasionally the PvP/PvE weekly season rank rewards. However, most people end up using the gem-purchased pets and accessories -- they're the easiest to find at rarities above Common and they're pretty well focused on their advertised roles to boot.
Usually people reccommend the (large) Defense Egg as a first gem shop purchase (not counting the forced tutorial of course). Defense pets will help you sustain your multiple-battle dungeon runs, which is what most of this game is about. Offense pets aren't bad by any means, but they trade off the long-term survivability you'd get with the Defense pets for burst damage (which might have its uses for PvP settings, or at boss fights). Follow this up with an Offense or Defense Accessory Box based on which of the two roles you think you'll want more at the late game.
Gems are also often used to bribe Legendary quality familiars. You'll need 1600 to guarantee success when a capture chance presents itself. People may recommend you buy one egg and box from the gem shop, then just save up for this and keep 1600 gems available at all times while buying more pets and accessories. Until you have that 1600 gem buffer, try to keep at least 8000 gold on hand just in case that chance comes earlier than you'd like - 10% is not a favorable success rate at all, but it's still better to be able to try for it as they can be significant game-changers.
Note that Pets and Familiars are two different things. Pets are equipped on your character to provide it with a special damage/heal ability, whereas Familiars are monsters you bring along as teammates.
What familiars you take with you in your party is in part decided by your luck with captures. Capture Rate bonuses exist to get you more chances at an offer, but there is no way to improve the persuasion success rate. Common tier familiars can mostly be ignored unless you want to complete your collection or need one for a fusion. Typical parties have some form of sustaining themselves, whether through direct healing or life draining attacks. Some of the most popular recommendations for familiars to get:
Early game familiars
Base familiars (you can just capture these):
Bit Heroes is, put simply, a simple turn-based game where you explore dungeons searching for loot and monsters. Much of this game plays out like a single-player experience, but other players can have an impact on your game -- in-game friends can join your party when you take on the major dungeons this game has to offer, and the weekly PvP and PvE activities are ranked based on your performance compared to other players.
When you create a character, you'll be able to customize your appearance a little bit (mostly the face) and pick an in-game name. Once you proceed, you won't be able to change your character name, so pick something that you will want to be known by (NOTE: inappropriate names are usually changed to something else by the devs). Appearance can be changed but the price is pretty steep (1000 gems).
The game guides you through the first few battles. Some of the key points to take away from this:
- Each character has three primary stats: Power, Stamina, and Agility.
- Power improves the damage and healing of your character's abilities, as well as your equipped pet's ability.
- Stamina grants the character 10 maximum health points for each point of Stamina.
- Agility allows the character to take more turns in combat by filling your action bar faster. The rate at which you take turns is based on a formula I helped to come up with, but generally you can expect the turn rates to be proportional to how much Agility you have (a character with 20 Agility can take twice as many turns as a character with 10 Agility). I'll explain the formula a bit more in-depth in the Additional Tipssection.
- You can recruit monster familiars for your own party -- on rare occasions when you defeat a monster you will get a capture chance (how often you get these can be improved with Capture Rate bonuses from daily bonuses (Monday/Thursday/Saturday) and minor runes). The game gives you a Batty and Booboo during the tutorial sequence through using gold to make persuasion attempts. Despite appearances of a 40% persuasion success rate you're guaranteed to get those two, but after that the RNG will not be so nice and there is no way to improve the persuasion success rate.
- You can buy things from the shop in town, usually for the premium gems currency (some of the cheaper things can be bought with gold). The game makes you purchase an average item find scroll for 300 gems -- as annoying as it is, the game did give you those 300 gems for free from one stage reward. You'll be getting more gems later on and you can save the scroll for later, too.
- Higher rarity weapons have more abilities in their skillset. All equipment (or lack thereof) provides a basic attack with no Skill Point cost. Common (green) equipment will have one skill in addition to this, while Rare (blue) equipment will have two skills and Epic (light red) equipment will have three skills. Later in the game there will be Legendary (yellow) and Set (cyan) equipment with four skills!
- At some point you'll find you cannot proceed through a stage when it becomes too difficult. You can repeat major dungeons to work on improvements to your equipment or familiars.
- You will get a Skeleton Key very early on. This can be used to unlock one red chest found rarely in dungeons, providing you with a guaranteed Epic equipment drop among other things. It is suggested to save this key for use later on, preferably somewhere in the third zone map of Lakehaven. It's also suggested not to buy more with gems, as they can be found from very rare drops or earned from the 5th day of the 10-day login reward cycle.
Z_D_ - Zone #, (Major) Dungeon #
Z_F_ - Zone #, Flag # - refers to the smaller "flag" stages between the major dungeons
Occasionally a flag will become notorious enough to be referred to by its boss encounter. Here's the ones most often noted:
Z2F3 - Pengey / McGobblestein Alliance, more often called the penguin and chicken (even though it's really a turkey). Recommended strategy is to focus on backline damage, e.g. spear weaponry.
Z2F5 - Giant Sugg. This boss can catch players unaware with its vastly higher than expected Agility. Remember to keep your most fragile party member in the back as Sugg has a skill to hit the front 2 positions.
Z3F2 - King Dina. The gatekeeper for entry into zone 3's dungeons. This has a suggested stat total of 200 to get past; Dina only ever attacks the front, but he will hit fast and hard.
Z4F8 - Mega Zorg. The gatekeeper for entry into raid 2. Suggested stat total to take this on is around 550-600. Like Dina, Zorg will only attack your front position.
Details and Strategies
This section will contain some advice and info that I frequently see posted in chat. Among the most popular questions are those relating to your player character's stats and equipment, including the Pet and Accessory slots. It is, after all, a core part of your progression as a player.
Which stat is best? They're all useful, really -- but these builds emerge as the standard:
- Damage Dealer build: Focusing on the stats of Power and Agility, this build seeks to do as much damage to enemies as possible. The faster you take enemies out, the less damage you'll sustain. It is suggested to balance the stats out, or to favor Agility; a heavy focus on Power without enough Agility to back it up usually leads to enemies getting hits in. Very useful for early game when your familiars are considerably below you in terms of stat total.
- Off-Tank build: Focusing on roughly equal parts Power and Stamina, this build takes hits and dishes them out. Whenever you can mitigate an enemy's attack, it'll be easier to heal through. Relies on your familiars/friends to do damage, as well as having a good quality defensive Pet and Accessory to be able to react well to taking hits -- so it's usually put off for later in the game while you set these things up. Usually people wanting to go this route later on start by putting their level-up points into Power and using equipment upgrades to raise the stat they need at the time (Agility equipment upgrades early, Stamina upgrades later on when at raid dungeons).
- Full Tank build: Going all the way on Stamina, this build is designed to stall out the enemy team from hitting your damage dealers. This is not recommended early on as it requires extensive setup to perform well (a good defense Accessory, familiars/friends to do damage, and the meta rune to redirect attacks), and only really performs its role admirably well in the second raid dungeon. Usually people wanting to go this route start out as a damage dealer and transition into this with a stat reset at the appropriate time.
Regarding those Pet and Accessory slots, there are no dungeon loots for these things. You can only get them from three sources: the gem shop, the guild shop, and occasionally the PvP/PvE weekly season rank rewards. However, most people end up using the gem-purchased pets and accessories -- they're the easiest to find at rarities above Common and they're pretty well focused on their advertised roles to boot.
Usually people reccommend the (large) Defense Egg as a first gem shop purchase (not counting the forced tutorial of course). Defense pets will help you sustain your multiple-battle dungeon runs, which is what most of this game is about. Offense pets aren't bad by any means, but they trade off the long-term survivability you'd get with the Defense pets for burst damage (which might have its uses for PvP settings, or at boss fights). Follow this up with an Offense or Defense Accessory Box based on which of the two roles you think you'll want more at the late game.
Gems are also often used to bribe Legendary quality familiars. You'll need 1600 to guarantee success when a capture chance presents itself. People may recommend you buy one egg and box from the gem shop, then just save up for this and keep 1600 gems available at all times while buying more pets and accessories. Until you have that 1600 gem buffer, try to keep at least 8000 gold on hand just in case that chance comes earlier than you'd like - 10% is not a favorable success rate at all, but it's still better to be able to try for it as they can be significant game-changers.
Note that Pets and Familiars are two different things. Pets are equipped on your character to provide it with a special damage/heal ability, whereas Familiars are monsters you bring along as teammates.
What familiars you take with you in your party is in part decided by your luck with captures. Capture Rate bonuses exist to get you more chances at an offer, but there is no way to improve the persuasion success rate. Common tier familiars can mostly be ignored unless you want to complete your collection or need one for a fusion. Typical parties have some form of sustaining themselves, whether through direct healing or life draining attacks. Some of the most popular recommendations for familiars to get:
Early game familiars
Base familiars (you can just capture these):
- Tubbo: A decent enough starter tank that can tide you over for a little while. Found in the very first major dungeon of zone 1, Grimz Crossing.
- Bob: He's a solid damage dealer, and I'm not biased because of my name here. Found in the second major dungeon of zone 1, Dryad's Heart.
- Shrump: Somewhat worse than Bob at doing effectively the same things but you'll want to have one later for a special fusion. Also found in the second major dungeon of zone 1, Dryad's Heart.
- Mer'lan: A very capable yet fragile healer. Can also double as a damage dealer role when you're not using him to heal. Found in the third major dungeon of zone 1, Lord Cerulean's Tomb.
- Grampz: A large blob of health is what this guy basically is, and he will hold your frontline for a long time. Found in the second zone, in the second major dungeon, Blubber's Gutter.
- Sha'man: A decently sturdy damage dealer that you can use when the really fragile DPS familiars fail you. Found in the second zone, in the third major dungeon, Gemm's Cell.
- Bubbo: A fusion of Batty + Tubbo, this will be an improvement to your starter tank.
- Bor'lan: A fusion of Bob + Mer'lan, this is a much better healer due to the reduced cost of his healing skill.
- Shrampz: A fusion of Shrump + Grampz, this Full Tank familiar actually comes with a chance to Block incoming attacks (reducing damage received by half). This will make it easier for heals to keep up.
- Squibbo: A fusion of Squib (raid 1) + Tubbo (z1d1), this healer will replace Bor'lan quite nicely. Albeit slower, the damage and heals are significantly better and this familiar is slightly less fragile.
- Yobo: A fusion of Yeti (z2d1) + three sprocket materials, this tank has more block than Shrampz (albeit less health). Even though this familiar can be accessible early with enough luck, the difficulty to assemble and Shrampz's comparable tanking ability will likely put this off for a bit later.
- Cuerade: A fusion of Lord Cerulean (z1d3) + Shade (raid 1), this familiar can do some decent damage to the backline. Often found in PvP at the mid-game.
- Quirk: A fusion of Quirrel (z3d3) + Gak (z2d2), this familiar does pretty decent damage to whatever you choose to target. Often found in PvP at the mid and late-game.
- Warffin: A fusion of Warty (z4d2) + Driffin (raid 2). Potential replacement for Squibbo in situations with high targeted damage. Trades off some healing ability for survivability.
- Rolace: A fusion of Roy (z4d1) + Violace (raid 2). A useful tank for a PvP team, due to its Deflect passive and low cost targeted hits.
- Pretty much any legendary familiar, but especially the legendary fusions. Some legendary fusions are obtained by fusing 1-2 legendary familiars, while others are fusions of 3 epic familiars (usually those epics are fusions themselves). Some people might argue against Mimzy (raid 2 greedy familiar) as it is very fragile, however.
- You can usually switch your party members' positions during battle (sometimes this is disabled in PvP weeklies, but not always). It's a free action so use it to spread incoming damage across your party members and prolong your runs through those difficult places.
- Potions are limited to one per character, per dungeon. Save your major potions for the problematic flags noted earlier in this guide.
- Interacting in friendly and positive ways with the community tends to get you some really nice friends in return. We're all people that want to have fun too.
- There is a /help command in the in-game chat. This shows you a list of chat commands (at time of writing, there is only /view playername and /clear).
- The shop is constantly running a flash sale, 25% off the usual price for a randomly picked item every 8 hours or so. Not all items in the shop can go on flash sale, notably you'll never see the eggs / boxes / chests there. However, this does include the minor boosts you can buy with gold, so stock up on some of these when you get a chance.
- Speaking of boosts, if you know you're active enough to get 20k gold normally in a day (without gold boost bonuses) consider keeping the minor gold boost on all the time. You'll make enough extra gold to cover the cost of the boost. This may be doable when you unlock Trials/Gauntlet, but it becomes much easier once you can start doing raid dungeons too.
- For those wanting the turn rate formula, where P is Power and A is Agility: [(P+A) / 2]^2 / (P). This formula seeks to correct the "DPS loss" caused by an imbalance in Power and Agility, ensuring all distributions for a given total of points in Power + Agility yield the same DPS over time for normal attacks.
Last edited:
- 1