3d Printing and the Future of Piracy

Hekotat

FoH nuclear response team
12,068
11,562
Why don’t you get an auto leveler? They’re cheap and easy to install.

That’s something I’ve never really had an issue with, I just check the level every so often, mine doesn’t move much. There’s also clamps you can print to keep them in place better. I have a friend that won’t print without one after installing one.

That said I wouldn’t mind one of the systems that auto levels and compensates for any unevenness, like the Prusa has. The prints that come off those are just flawless.

Oh I've got one, I was just saying that is the worst part if you don't have one. Mine compensates and it's pretty nice.

 

Captain Suave

Caesar si viveret, ad remum dareris.
4,814
8,142
My awesome wife got me a Voxelab Aquila for Christmas. I know it's not the best/fanciest, but looks to be a good starter printer. Fun with plastic, ho!
 
Last edited:
  • 2Like
Reactions: 1 users

Hekotat

FoH nuclear response team
12,068
11,562
My awesome wife got me a Voxelab Aquila for Christmas. I know it's not the best/fanciest, but looks to be a good starter printer. Fun with plastic, ho!
Kickass man, welcome to they party.

First thing to do is assembly and check every fucking bolt on the machine again, I got burned hard the first time and spent months chasing my tail. My second one had just as many loose bolts.

Secondly level that gantry before starting.

3rd, Extruder calibration, bed leveling and z offset.

Let us know if you need any guidance tips. I've been considering making a startup guide since there isn't any good information out there for people getting into the hobby, which is absolutely shocking to me.
 
  • 3Like
Reactions: 2 users

The_Black_Log Foler

Stock Pals Senior Vice President
<Gold Donor>
44,214
41,314
Prusa xl lead time is way too long.. Looking at alternatives.
 

Captain Suave

Caesar si viveret, ad remum dareris.
4,814
8,142
Wow, this is so much "fun"! Printer assembly was straightforward, but initial bed leveling was impossible because the z-axis limit switch was set too high at the factory, which I had to discover and then figure out how to fix, and then I had to improvise my own tube clamp on the filament feeder because the damn thing fell out in the first 10 seconds of every print. (The clamp had been removed from new hardware versions because it "wasn't necessary", but I beg to fucking differ.)

Anyway, after a good half day of this bullshit I'm currently attempting Benchy as a first test print, looks good so far 20 minutes in.
 
Last edited:

Hekotat

FoH nuclear response team
12,068
11,562
Wow, this is so much "fun"! Printer assembly was straightforward, but initial bed leveling was impossible because the z-axis limit switch was set too high at the factory, which I had to discover and then figure out how to fix, and then I had to improvise my own tube clamp on the filament feeder because the damn thing fell out in the first 10 seconds of every print. (The clamp had been removed from new hardware versions because it "wasn't necessary", but I beg to fucking differ.)

Anyway, after a good half day of this bullshit I'm currently attempting Benchy as a first test print, looks good so far 20 minutes in.

Nice, you better post some pics of that first benchy so we can ridicule you.

Make sure to look into a filament dryer (I use this instead of the tube), if you can afford one. Many filaments must be dry in order to print properly and fuck putting them in the oven. I also have some giant tupperware containers with desiccant for storage.

I'm still battling elephant's foot. I re-installed windows since it's been a few years and forgot to save my profiles for Cura and now I'm starting from scratch basically. I'm starting to think it's the Z offset, I made big changes to it when I went from one filament to the other, and I think I went too far. Mainly because I'm sure I can't go much lower on bed/nozzle temps. and nothing else makes sense.
 

Captain Suave

Caesar si viveret, ad remum dareris.
4,814
8,142
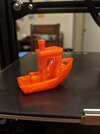
Nice, you better post some pics of that first benchy so we can ridicule you.

Turned out pretty well for a first try I think. Some very minor sagging at the top of the arches and the 0.1mm writing on the stern is illegible, but the important stuff passes the eye test. I'll measure with calipers against spec later.
 

Attachments

  • PXL_20211223_060249801.jpg
    PXL_20211223_060249801.jpg
    3 MB · Views: 29
  • 1Like
Reactions: 1 user

Hekotat

FoH nuclear response team
12,068
11,562
Turned out pretty well for a first try I think. Some very minor sagging at the top of the arches and the 0.1mm writing on the stern is illegible, but the important stuff passes the eye test. I'll measure with calipers against spec later.

Hard to tell from the color and lighting but may be some under-extrusion on the top. You calibrated your extruder?

Pretty damn good for the first one.
 

Hekotat

FoH nuclear response team
12,068
11,562
Looks like Z Offset was the main culprit, I'm very close now. Maybe a few more prints and I'll have it dialed in and continue this PC case project.
 

Hekotat

FoH nuclear response team
12,068
11,562
First assembly complete, back-plate came out imperfect with pillowing texture, but it will do for test fitting. Next will be the bottom plate, however, I have to figure out the feet and mounting holes for the bottom plate.

ApplicationFrameHost_Dofgxo5ZFI.png


ApplicationFrameHost_ot0GkGscAD.png
 
  • 5Like
Reactions: 4 users

Hekotat

FoH nuclear response team
12,068
11,562
Finished a 34 hour print late in the night last night, get up to see that Fusion 360 added a part to the print making it completely unusable. Unsure what happened, but I had to do some weird shit in Fusion 360 in order to export it to remove this anomaly (Copy, paste new in new project and save). If I tried to do it any other way it would add the anomaly on export.

Gonna have to start the print again tomorrow, but atleast I can test fit some of the case pieces. I've got a stringing issues now as well I have to figure out. Not a big deal since it pulls off easily but it's an annoyance.

You can see the added bar blocking mounting holes and panel alignment.

Fusion360_wQey3aHcK5.png


vivaldi_9FlR7FgKHD.jpg
 
  • 3Like
Reactions: 2 users

Hekotat

FoH nuclear response team
12,068
11,562
How much in raw material cost does it tally to, Hekotat Hekotat ? Other than it being cool making your own stuff.

I'll still be way way way under budget versus buying a Loque Ghost. Each spool of material is 38 bucks and I haven't gone through one yet. That piece was the largest amount and it took half a spool. Will be at a full spool when it's complete and the test fit seems good, after I get a proper bottom plate I'll pull some PC parts to test mounting.
 
  • 1Like
Reactions: 1 user

Aazrael

Golden Baronet of the Realm
2,568
9,123
Got my 3d printer today. Was a bit impatient and started right away to print for a shim for the flex plate. It came out okay but not perfect. It was all default settings and kinda low temp resin as it had been outside an hour earlier.

Good enough to get the flexplate installed though. Will practice a few more simple objects before I do some miniatures.

20220103_105851.jpg
20220103_111049.jpg
 
  • 7Like
Reactions: 6 users

The_Black_Log Foler

Stock Pals Senior Vice President
<Gold Donor>
44,214
41,314
Finished a 34 hour print late in the night last night, get up to see that Fusion 360 added a part to the print making it completely unusable. Unsure what happened, but I had to do some weird shit in Fusion 360 in order to export it to remove this anomaly (Copy, paste new in new project and save). If I tried to do it any other way it would add the anomaly on export.

Gonna have to start the print again tomorrow, but atleast I can test fit some of the case pieces. I've got a stringing issues now as well I have to figure out. Not a big deal since it pulls off easily but it's an annoyance.

You can see the added bar blocking mounting holes and panel alignment.

View attachment 390770

View attachment 390771
What printer are you using? Ordered a Prusa mk3s+ last month. Seemed like a good first printer. Eventually I’d like to look into something with larger print space but it’ll do for now.
 

Aazrael

Golden Baronet of the Realm
2,568
9,123
Seems to be printing fine so far. It is a bit messy though with resin. Cookie cutter fish test print. These take 30 minutes to print. So a mini will take probably 5 hours?

20220103_124317.jpg
 

Hateyou

Not Great, Not Terrible
<Bronze Donator>
16,352
42,503
Seems to be printing fine so far. It is a bit messy though with resin. Cookie cutter fish test print. These take 30 minutes to print. So a mini will take probably 5 hours?

View attachment 390849
It depends on how tall it is. Each layer past the initial layers take 8 seconds (or whatever you set it to) on a resin printer, unlike a FDM printer which each layer time is determined by the size of the layer. A WH sized miniature is probably closer to 2-3 hours. You can print multiple at once without changing the print time too, just remember you increase your risk of failure for each one you add. So say you printed one, it takes 2.5 hours. You could print ten at once and since the later times are always the same it would still take 2.5 hours. Doing one model that takes 2.5 hours on an FDM printer would take 25+ hours if you did ten at once.

I usually do a pause after the initial layers are done to make sure it stuck to the bed plate. Resume if it did, cancel if it didn’t.

Also remember to gently scrape the bottom of your bath to make sure there’s nothing hard down there before every print. I once had a small piece come off and in the bath, next print it tried to crush it, the piece broke and it splattered resin all over inside my case. Luckily it didn’t break my screen.
 
  • 1Like
Reactions: 1 user

Aazrael

Golden Baronet of the Realm
2,568
9,123
It depends on how tall it is. Each layer past the initial layers take 8 seconds (or whatever you set it to) on a resin printer, unlike a FDM printer which each layer time is determined by the size of the layer. A WH sized miniature is probably closer to 2-3 hours. You can print multiple at once without changing the print time too, just remember you increase your risk of failure for each one you add. So say you printed one, it takes 2.5 hours. You could print ten at once and since the later times are always the same it would still take 2.5 hours. Doing one model that takes 2.5 hours on an FDM printer would take 25+ hours if you did ten at once.

I usually do a pause after the initial layers are done to make sure it stuck to the bed plate. Resume if it did, cancel if it didn’t.

Also remember to gently scrape the bottom of your bath to make sure there’s nothing hard down there before every print. I once had a small piece come off and in the bath, next print it tried to crush it, the piece broke and it splattered resin all over inside my case. Luckily it didn’t break my screen.
I was prepared for a few fails of them not sticking but seems I was lucky it just worked. Saw you could use a dry oil on the bottom so it does not sick there.

Printing a smaller unit now but the one I really want will take 6.5 hours and no wings included in that.

The WH sized one I'm doing now was 2.5h.
 

Aazrael

Golden Baronet of the Realm
2,568
9,123
This video made cleaning the FEP a lot easier. Basically put a support from another model in a corner, blast the Tank Clean program and lift away the whole film without having to empty the tank etc.


Printing a big "mini" right now. Body 9 hours, base 4 hours and wings 9 hours. Will post a picture when he is done tomorrow unless something fails with the wing parts.